Oxygen Analyzers
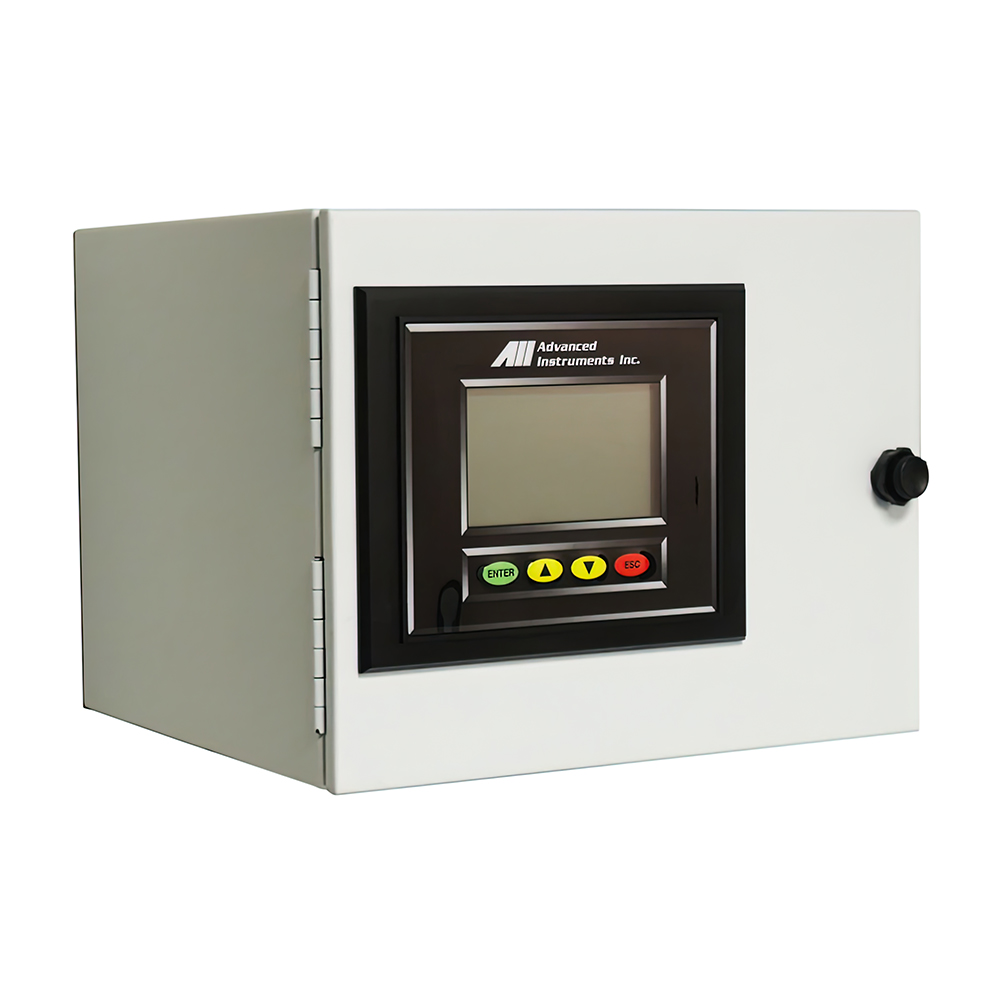
AII PI2 PPB Oxygen Analyzer
Features
- Measurement ranges
- GPR-12-2000 MS2: 0-1, 0-10, 0-100, 0-1000 ppm
- GPR-12-2000 MS2E: 0-500 ppb, 0-1, 0-10, 0-100, 0-1000 ppm
- GPR-13-2000 UHP2: 0-100 ppb, 0-1, 0-10, 0-100 ppm
- GPR-13-2000 UHP2E: 0-50, 0-100 ppb, 0-1, 0-10 ppm
- Accuracy
- MS 1000 and 500: <3% of reading or ±5 ppb
- UHP 100 and 50: ±3% of reading or ±0.5 ppb
- Sensitivity
- MS 1000: <5 ppb
- MS 500: <2.5 ppb
- UHP 100: <250 ppt
- UHP 50: <100 ppt
- 1.4-3.4 barg (20-50 psig) with atmospheric vent,
max 10.3 barg (150 psig) inlet pressure - 0.5-1.0 Nl/m (1-2 SCFH) flow rate
$7,650.00 – $12,138.00
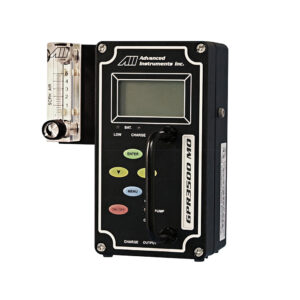
Compare- The AII PI2 PPB oxygen analyzer uses the stable, long-life Pico-Ion sensor to provide measurements down to low parts-per-trillion oxygen in ultra-high-purity gases.The high-performance, low-ppb sensor does not require maintenance or frequent electrolyte additions.The innovative design of the gas chamber maximizes the rate of oxygen reaction, while the refined proprietary sensor design provides a high-signal output per unit area to enhance sensitivity.The sensor also features a lower detectable limit (LDL) of less than 100 ppt, high signal-to-noise ratio, a response time of less than 15 seconds, minimization of temperature dependence, and fast recovery from higher oxygen levels during process upset conditions.
- The analyzer is operated by easy-to-use, menu-driven software and a large graphical LCD with four control keys.It can be operated remotely via USB or RS232, and allows the operator to obtain the data, change settings, calibrate and diagnose the instrument.The PI2-UHP analyzer has an ultra-clean sampling system designed for measuring < 100 ppt oxygen.
| Model | GPR-12-2000 MS2 (lowest range 0-1 ppm), GPR-12-2000 MS2E (lowest range 0-500 ppb), GPR-13-2000 UHP-2 (lowest range 0-100 ppb), GPR-13-2000 UHP-2E (lowest range 0-50 ppb) |
|---|
| PI2-MS 1000 | PI2-MS 500 | PI2-UHP 100 | PI2-UHP 50 | |
| Measurement range | 0-1, 0-10, 0-100, 0-1000 ppm | 0-0.5, 0-1, 0-10, 0-100, 0-1000 ppm | 0-100 ppb, 0-1, 0-10, 0-100 ppm | 0-50, 0-100 ppb, 0-1, 0-10 ppm |
| Accuracy at constant conditions | < 3% of reading or ±5 ppb (whichever is greater) | < 3% of reading or ±5 ppb (whichever is greater) | ±3% of reading or ±0.5 ppb (whichever is greater) | ±3% of reading or ±0.5 ppb (whichever is greater) |
| Response time | T90 <15 seconds | T90 <15 seconds | T90 <15 seconds | T90 <15 seconds |
| Recovery time | See separate table on inside pages | See separate table on inside pages | See separate table on inside pages | See separate table on inside pages |
| Sensitivity (LDL) | < 5 ppb | < 2.5 ppb | < 250 ppt | < 100 ppt |
| Linearity | < 1% of scale | < 1% of scale | < 1% of scale | < 1% of scale |
| Sensor | GPR-12-2000 MS-2 | GPR-12-2000 MS-2E | GPR-13-2000 UHP-2 | GPR-13-2000 UHP-2E |
| Sensor life at 25ºC (77°F) and 1 atm | 12 months (Up to 24 months for the MS versions) |
12 months (Up to 24 months for the MS versions) |
12 months (Up to 24 months for the MS versions) |
12 months (Up to 24 months for the MS versions) |
| Calibration interval | 30 days | 30 days | 30 days | 30 days |
| Inlet pressure | 1.4-3.4 barg (20-50 psig) with atmospheric vent, max 10.3 barg (150 psig) |
1.4-3.4 barg (20-50 psig) with atmospheric vent, max 10.3 barg (150 psig) |
1.4-3.4 barg (20-50 psig) with atmospheric vent, max 10.3 barg (150 psig) |
1.4-3.4 barg (20-50 psig) with atmospheric vent, max 10.3 barg (150 psig) |
| Flow rate | 0.5 – 1.0 Nl/m (1-2 SCFH) | 0.5 – 1.0 Nl/m (1-2 SCFH) | 0.5 – 1.0 Nl/m (1-2 SCFH) | 0.5 – 1.0 Nl/m (1-2 SCFH) |
| Gas connections | 1/4” compression tube fittings | 1/4” compression tube fittings | Inlets: 1/4” face seal fittings; Vent and pneumatic valves: 1/4” compression tube fittings | Inlets: 1/4” face seal fittings; Vent and pneumatic valves: 1/4” compression tube fittings |
| Wetted parts | Stainless Steel | Stainless Steel | Stainless Steel | Stainless Steel |
| Display | Graphical LCD 12 x 7cm (5 x 2.75”); resolution 0.1 | Graphical LCD 12 x 7cm (5 x 2.75”); resolution 0.1 | Graphical LCD 12 x 7cm (5 x 2.75”); resolution 0.1 | Graphical LCD 12 x 7cm (5 x 2.75”); resolution 0.1 |
| Enclosure | Bench top, painted sheet metal (35 x 25 x 34cm / 13.9” x 9.9” x 13.4”) |
Bench top, painted sheet metal (35 x 25 x 34cm / 13.9” x 9.9” x 13.4”) |
Bench top, painted sheet metal (35 x 25 x 34cm / 13.9” x 9.9” x 13.4”) |
Bench top, painted sheet metal (35 x 25 x 34cm / 13.9” x 9.9” x 13.4”) |
| Options: panel or 19” rack mount, wall mount (30.5 x 30.5 x 20.3cm / 12” x 12” x 8”) |
Options: panel or 19” rack mount, wall mount (30.5 x 30.5 x 20.3cm / 12” x 12” x 8”) |
Bench top Options: panel or 19” rack mounting |
Bench top Options: panel or 19” rack mounting |
|
| Compensation | Barometric pressure and temperature; heated sample system and sensor housing | |||
| Signal output | 4-20 mA isolated, 0-1V and 0-5V | |||
| Range ID | 1-5V DC or 4-20mA, optional relay contacts | |||
| Communications | Choice of USB, RS232 | |||
| Alarms | 2-off user-adjustable alarms form C relay contacts non-latching | |||
| Operating temperature | 0° to 45°C (32°F to 113°F) | |||
| Power | 100-240 V AC | |||


